Actions in Tally Definition Language (TDL)
TDL Actions
TDL is a language that is based on actions. TDL Variables, Key, Button and Menu are the source of all actions. TDL Prefixes and symbols are access specifiers and are used primarily to get the value of variable, field, method, formula along with others. A mouse click or a keyboard shortcut can be used to trigger an event. Some predetermined activities are carried out during an event. Check out the following scenario:
When the Ctrl+A key is pressed from a voucher, the entry screen is accepted.
Download Free 90+ Tally Shortcut Keys
The Company Selection screen appears when you press the F1 button from the Gateway of Tally menu.
Actions are triggers for a specified task with a defined outcome. A User Interface Object such as a Menu, Form, Line, or Field is always the source of action.
Actions Categories
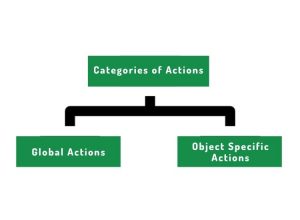
Actions can be grouped into two broad classifications, viz
- Global Actions
- Object Specific Actions
Global Actions aren’t associated with any User Interface Object. Display, Create, Execute, Alter, and other Global Actions are examples. Regardless of the UI Object, they carry out the action required. A Report or a Menu is used to perform Global Actions.
Actions that can only function on specific UI Objects are known as Object Specific Actions. For instance, a Part owns many lines and an individual Line cannot change the current focus to the next line, ‘Line Down‘ is a Part-Specific Action. Only the Part has the ability to shift the focus to the next line. On applicable User Interface Objects, Object Specific Actions are done.
Global Actions | Object Specific Actions |
Global Actions aren't bound to any User Interface Object. | Actions are precise to User Interface Object particularly. |
It can emerge from a Menu, a Button/ Key, or a Field. | A Menu, Form, Line, or Field can start the process. |
A report or a menu can be used to perform this action. | The project is being carried out on the relevant Interface Object. |
Create, Display, Alter, Print, Print Report, Modify Object, Display Collection, and so on are some examples. | Line Up, Line Down, Explode (‘Line' Object), Accept, Reject (‘Form' Object), and so on are some examples. |
Association of Action
At several levels, actions can be allied.
Action Association at Menu Definition
The Menu Item is used to associate actions at Menu definition. Except for Quit, every menu item is linked to a specific action. If an Item is added but no action is specified, the default action is to exit the current menu.
Syntax
[Menu : <Menu Name>]
Add : Key Item : [Position] : <Display Item> : <Unique Key> :<Action Keyword> : <Action Parameter>
Where,
<Action Keyword> any Global Action.
<Action Parameter> is determined by the Action Keyword. If Menu is the Action Keyword, the Action Parameter must be a Menu Name; otherwise, the Action Parameter must be a Report Name.
Example:
[Menu: Commonly Used Reports]
Add: Key Item : Trial Balance : T : Display : Trial Balance
Add: Key Item : At Beginning : Outstandings : O : Menu : Outstandings
A Menu usually used Reports are defined in this example with two items, namely,
- The default report Trial Balance is displayed when an Item Trial Balance is added. Action Value had to be a Report Name as the action is displayed.
- To activate another Menu Outstanding, an Item Outstanding is inserted at the beginning. As the action is Menu, the Action Value must be a Menu Name.
Action Association at Button/Key Definition
Attribute Action is used, following the Action Keyword and, if necessary with the parameters for Action Association at Button/Key definition.
Syntax
[Button : <Button Name>]
Action : <Action Keyword> [: <Action Parameters>]
Where,
<Action Keyword>any Global or Object Specific Action.
<Action Parameters> is determined by the Action Keyword. If Menu is the Action Keyword, the Action Parameter must be a Menu Name; otherwise, the Action Parameter must be a Report Name.
Example: Actions with Parameters
[Button : Outstandings]
Key : F5
Action: Menu: Outstandings
[Button : Trial Balance]
Key : F6
Action : Display : Trial Balance
A Menu Name is required as a parameter for Action Menu, and a Report Name is required for Actions Create, Display, Alter, and so on.
Example: Actions without Parameters
[Button : Printing Button]
Action : Print Report
[Button : Exporting Button]
Action : Export Report
The Print Report and Export Report actions do not require any action parameters. If the Action parameter is provided, the specified Report is printed; else, the current Report is printed.
Action Association at ‘Field’ Definition
Using Parameters-based Action Keyword and optional condition action association at field can be done.
Syntax
[Field : <Field Name>]
<Action Keyword> : <Action Parameters>[: <Condition>]
Where,
<Action Keyword> can be either global or object-specific actions.
<Action parameters> are the Value on which these Actions could be performed.
<Condition> is an optional parameter. It limits the action to only being executed if the condition returns TRUE.
Example
[Field : My Trial Balance]
Display : Group : $$IsGroup
Display : Ledger : $$IsLedger
The Field Trial Balance in this example comprises two statements, namely,
1.If the current context object is a Group, a Group will be displayed.
2.If the current context object is a Ledger, a ledger will be displayed.
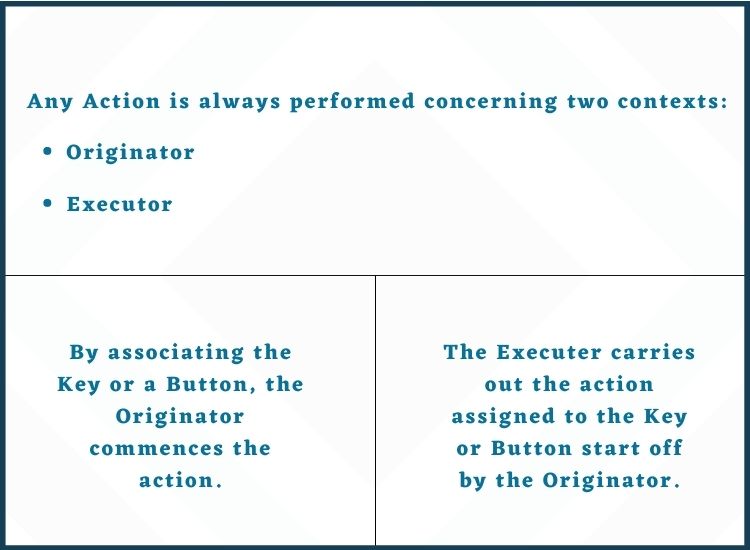
Any Action is always performed concerning two contexts:
- Originator
- Executor
The Originator initiates the action, such as a Down Arrow Key pressed on a Menu, Form, Line, or Field. The event is transmitted from the current Report to the Form, Parts, Lines, or Fields that are associated with it. Keys can be linked to Menus, Forms, Lines, and Fields. If the active Key is located in the Form, the search for Line Association continues until Field is obtained. The Lowest Level Key Association is given the most emphasis. The Field Level Key Association is executed if the Key is associated with both the Form and the Field. The Field is the Originator in this situation.
On executer, the action is performed. Form Accept Key, for example, is a Form Action despite being associated at the Field Level. As a result, Form performs the action. In the event of execution, it looks for the action to be performed from the Report to the Field. A Part Level Action is Line Down. Though it is related to the Form, the Part will execute it to transit the current focus to the next line. As a consequence, Part is a performer for the Action Line Down.
Originator | Executer |
By associating the Key or a Button, the Originator commences the action. | The Executer carries out the action assigned to the Key or Button start off by the Originator. |
Menus, Button/Keys, and Fields can initiate global actions, while Menus, Forms, Lines, and Fields can initiate object-specific actions. | The originator object performs the global actions. Object Specific Actions, on the other hand, can be performed by objects other than the originator. |
The order in which all Keys originating in a Report is gathered is Top to Bottom, i.e., from Report to Field definition. The lowest in the hierarchy prioritizes; for example, if the same key is connected with both Form and Field definitions, the Key at Field Definition is taken into account for execution. | The Keys originated are consumed in the following order: bottom to top, i.e. from a Field to a Report Definition. In other terms, the highest priority is given to the lowest in the hierarchy; for example, if the same key is applicable for both Part and Line definitions, the Key will be performed in the Line Definition context. |
Example 1 | Example 2 |
Global Actions
Global Actions, as previously stated, are actions that are not particular to any UI Object. The TDL Interpreter receives a signal from Global Action indicating which specific task should be performed to meet the user’s expectations. Reports, Collections, and Menus are the three basic definition types on which global actions are performed. The following are some of the most commonly used Global Actions:
Action – Menu
The Action ‘Menu’ only influences the Definition ‘Menu,’ and vice versa. A Menu Name must be the value of the ‘Menu’ Action. This Menu must be expanded to include a list of Items that display another Menu or a Report. A Menu Definition proceeds until all of the Items have been utilized to display Reports and the final Menu Items have no more Menu Actions assigned to them.
Example: 1
;; The following code illustrates the Action ‘Menu’ usage, along with further Menu Definitions
[#Menu : Gateway of Tally]
Add: Key Item : Sample Item : F : Menu : Sample Final Accounts
;; Menu Definition for the Menu to be displayed when the above Item is activated
[Menu : Sample Final Accounts]
Add: Key Item : Trial Balance : T : Display : Trial Balance
Add: Key Item : Profit & Loss : P : Display : Profit and Loss
Add: Key Item : Balance Sheet : B : Display : Balance Sheet
Tally’s Default Menu Gateway is modified in this example to add a new Item Sample Item, with the Sample Final Accounts Sub Menu is displayed in the ‘Menu’ action. All components of Final Accounts is displayed by Sub Menu Sample Final Accounts, i.e.,
- Trial Balance
- Profit & Loss
- Balance Sheet
The ‘Display‘ Action is used on all of the items in this section. As a result, no further Menu Definition is needed.
Example: 2
;; The following code illustrates the Menu usage and Display Actions and also the connection of their association in Menu and
;; Reports (through Form)
;; Button Definition to activate a Menu
[Button : Final Accounts]
Key : F5
Action : Menu : Sample Final Accounts
/* Since the above Button activates a Menu, it can be acted only upon a Menu It cannot be associated to a Report */
[#Menu : Gateway of Tally]
Buttons : Final Accounts ;; attaching a button to the menu
[#Form : Group Summary]
Buttons : Final Accounts
;;Above is an incorrect association as Buttons triggering Menu Action cannot be connected to a Form.
;; Button Definition to Display a Report
[Button : Balance Sheet]
Key : F6
Action : Display : Balance Sheet
/* Since the above Button activates a Report, it can be correlated to both a Menu & a Report */
[#Form : Group Summary]
Button : Balance Sheet ;; attaching a button to the report
[#Menu : Display Menu]
Button : Balance Sheet ;; attaching a button to the menu
In this example:
- A new Button Final Accounts has been added to the default Menu ‘Gateway of Tally’ to activate a Menu Sample Final Accounts.
- A Menu cannot be interacted upon in a Report as the Button Final Accounts cannot be linked to a report. The Button Final Accounts is connected to the Form ‘Group Summary’ in the example, which is inappropriate because the Menu cannot be called from a Report.
- Another Button Balance Sheet has been added to display the Report Balance Sheet, which is available in all Reports, Form Group Summary, and the Menu Display Menu.
- The Button Balance Sheet can be added to both a Report and a Menu, as a Report and a Menu can both act on the Report.
Action – Modify Object
This action changes an Object’s methods in the Object Hierarchy at any level. It allows you to change multiple values of an Object using a comma-separated list of Method: Values Pairs.
Syntax
Action : Modify Object : <PrimaryObjectSpec>.<SubObjectPathSpec>. MethodName : Value>[,Method Name : <Value> , …] [,<SubObjectPathSpec>. MethodName : <Value>, …..]
The <PrimaryObjectSpec >, SubObjectPathSpec >, and Method Name specifications are the same as those specified in the New Method syntax section of the Objects and Collections topic.
A single Modify Object Action can’t change the multiple primary Objects method, but it can change Object’s multiple values.
Only once Primary Object Specification is allowed to have Modify Object, for the first value. Only in Sub Object and Method Specification, further values permissible are optional.
Sub Object specification is optional from the second value onwards. The context is considered to be the Primary Object specified for the first value if Sub Object Specification is specified. If a sub-object specification is absent, the leaf object of the previous value specification is used as the context.
Example: 1
[Key : Alter My Object]
Key : Ctrl + Z
Action : Modify Object : (Ledger,”MyLedger”).BillAllocations [First, $Name=”MyBill”].OpeningBalance : 100,Address[Last].Address :”Bangalore”
The current ledger new values for the Opening Balance for the existing bill and address are being entered into “My Ledger“. Any Menu or Form can have the key Alter My Object connected to it.
Example: 2
[Key : Alter My Object]
Key : Ctrl + Z
Action : Modify Object :(Ledger,”MyLedger”).BillAllocations[1].OpeningBalance :1000,Name: ”My New Bill”,+
..Address[First].Address :”Hongasandra Bangalore”, Opening Balance:5000
The current ledger “My Ledger” is being updated with new values for the Opening Balance that applies to the current bill, the ledger’s Opening Balance, and the Address first line.
When a button with the action Modify Object is connected with a Menu definition, the primary object must be specified as Menu, which is not in the perspective of any Data Object.
Example:
[#Menu : Gateway of Tally]
Add : Button : Alter My Object
When assigning a key with the action Modify Object, keep the following points in mind:
- Since there are no Info Objects in the Menu, declaring Primary Object is required.
- The scopes supplied are ignored because Menu cannot act on scopes like Selected, Unselected, and so on.
- Menu Object is assumed to be the requestor in any formula stated in the value and evaluated.
- Method values for Company Objects can be modified as well.
- To define the action Modify Object at the Menu level, a button can be added to the Menu.
Action – Browse URL
With a URL formula submitted as a parameter, the Browse URL action is used to deliver a link to any web browser.
Syntax
Action : Browse URL : <URL Formula>
Example: Field acting as a hyperlink
[Key : Execute Hyperlink]
Key : Left Click
Action : Browse URL : “www.xyz.com”
[Field : Hyperlink Company]
Color : Blue Border : Thin Bottom
Key : Execute Hyperlink
Set as : “Tally Solutions Pvt. Ltd”
Local : Key : Execute Hyperlink : Action : Browse URL: http://www.abc.co.in
Actions – Create and Alter
Only the report definition can make the actions Create and Alter act. These actions put the report into the Create or Alter mode. To put it another way, the report begins in Edit mode. In the Create action, the user inserts the report to add values, whereas, in the Alter action, the user enters the report to change the values that have already been created.
These operations assist the user to key the appropriate values. The values inserted may or may not be stored. The way values are handled is determined by the requirement. If the user’s data inserted in the Report are required to be saved, they can be stored as part of the Tally Database or Configuration File.
- For future sessions, all the values of the persistent variable can be saved in a Configuration File tallysav.TSF.
- The values submitted in the Report can be saved in the Tally database as well.
The Report must be linked to a Data Object in order to store the values in the Tally database. Data objects in Tally ERP 9 include Group, Ledger, Voucher, and so on are some of the examples.
For example, to develop an interface for creating a Ledger:
- Using the Report Attribute ‘Object,’ the Object ‘Ledger’ must be linked to the Report.
- Values inserted by the user in Report Fields must be stored in applicable Methods using the Field Attribute ‘Storage.’
Example:
/* The following code demonstrates the usage of Action ‘Create’ and Attribute ‘Storage’ at Field Definition to store the values entered within the relevant Object associated at Report Level*/
[#Menu : Gateway of Tally]
Add : Key Item : Ledger Creation : L : Create : Create Ledger
[Report : Create Ledger]
Form : Create Ledger Object : Ledger
;; Object Association done at Report Level
[Form : Create Ledger]
Parts : Create Ledger
[Part : Create Ledger]
Lines : Store LedgerName, Store LedgerGroup
[Line : Store LedgerName]
Fields : Short Prompt, Name Field
Local : Field : Short Prompt : Info : “Name :”
Local : Field : Name Field : Storage : Name
/* Storing value entered by user in Internal Method Name available within Object associated at Report*/
[Line : Store LedgerGroup]
Fields : Short Prompt, Name Field
Local : Field : Short Prompt : Info : “Under :”
Local : Field : Name Field : Storage : Parent
Local : Field : Name Field : Table : Group
/* Similarly, Parent Method is stored with the user entered value which is considered as the Group of the Ledger created. Also Group is a default Table/Collection to display all the default as well as the user defined Groups. Field Attribute Table helps to restrict the user input to a predefined list*/.
Here is this example:
- The default menu of Tally’s Gateway has been changed to include a new Item Ledger Creation that allows users to create Ledgers.
- The Object Ledger is associated with Report Create Ledger, indicating that the Report is intended to create an Object ‘Ledger’ instance.
- Internal Methods Name and Parent store the Ledger’s Name and Group.
Example:
;; The following code illustrates the ‘Alter’ Action usage at Button
[Button : My Reco Button]
;; Button meant to do Bank Reconciliation
Key : Alt + F5
Action : Alter : Bank Recon
;; Alter’ Action in ‘Alter’ Mode to trigger Bank Recon Report
Title : “Reconcile”
;; Associating the Button to the Report
[Form : My Bank Vouchers]
Button : My Reco Button
Here is an example:
My Reco Button is set with an action to alter the report Bank Recon by pressing the Alt + F5 key. It is used to enter dates into the Bank Reconciliation report.
My Reco Button is linked to the My Bank Voucher Form.
Example:
;; The following code demonstrates the usage of Alter Action at Field
[#Menu : Gateway of Tally]
Add: Key Item : Ledger Display : L : Display : My Ledger
[Report : My Ledger]
Form : My Ledger
[Form : My Ledger]
Parts: My Ledger Height : 100% Page Width : 100% Page
[Part : My Ledger]
Lines : My Ledger
Repeat : My Ledger: Ledger
;; Ledger is a default collection of Ledger Objects
Scroll : Vertical
[Line : My Ledger]
Fields : My Ledger
Key: Line Object Enter Alter, Line Click Object Enter Alter
;;The above default Keys act upon Line Definition and the action Alter Object is associated with the Keys, provided the current Report is in Display Mode
[Field : My Ledger]
Set As : $Name
Variable : Ledger Name
;;Variable ‘Ledger Name’ retains the Ledger selected by the user for the subsequent report
Alter : Create Ledger
;; ‘Alter’ Action is utilized in ‘Alter’ Mode to activate the Report
;; ‘Create Ledger’ is a report which is user defined and defined while Creation of Ledger
In this case,
- Line definition has two default keys that allow you to choose any of the lines from the range of repeated lines.
- Alter object is the action connected with these keys, which implies that when you press the key, the object associated with the current Line must be changed.
- Mode: Display indicates that the current report must be in Display mode, as stated in the keys.
- The Alter action in the definition of Field prevents the activation of reports on the current field, which must be in Alter mode.
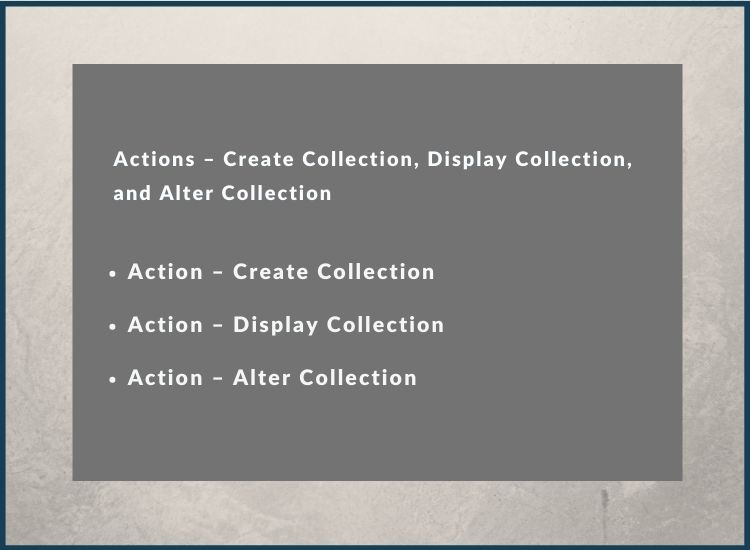
Actions – Create Collection, Display Collection, and Alter Collection
Action – Create Collection
With the action Create Collection, a Menu Item could be used to create Objects in a Collection. This action is commonly used to create Master such as Groups, Ledgers, Stock Items, Voucher Types, and so on. Create Collection is a command that retrieves a report from a specified Collection. In Create mode, a report generated by this action is displayed.
Example:
;; The following code illustrates the ‘Create Collection’ action usage
[#Menu : Gateway of Tally]
Add: Key Item : Ledger : L : Create Collection : Ledger
;; where a Ledger is a DefTDL predefined Collection
To create Objects in a collection, the action Create can be used instead of Create Collection. The only difference between Create and Create Collection is that Create expressly calls for a Report whereas Create Collection needs a collection. ‘Create Collection’ runs the same report in the specified Collection.
Action – Display Collection
A popup of Object names in a Collection can be displayed using a Menu Item or a Button, which can then trigger a Report. When you select an Object from the popup, the action Display Collection triggers a report in Display mode. This action can be used to show the Masters or Reports for Groups, Ledgers, stock items, and other objects.
Example:
;; The following code illustrates the ‘Display Collection’ Action usage
[#Menu : Gateway of Tally]
Add: Key Item : Ledger : L : Display Collection : Ledger
;; where Ledger is a DefTDL predefined Collection.
Despite the fact that the action’s name is Display Collection, Display refers to the subsequent Report that appears when an object is selected. The Report is in Display mode here.
Action – Alter Collection
Alter Collection is equivalent to Display Collection, but it triggers the Report in Alter mode. This action is typically used to change masters such Groups, Ledgers, Stock Items, and Voucher Types.
Example:
;; The following code illustrates the ‘Alter Collection’ Action usage
[#Menu : Gateway of Tally]
Add: Key Item : Ledger : L : Alter Collection : Ledger
;; where Ledger is a predefined Collection in DefTDL
Despite the fact that the action is Alter Collection, Alter is for the subsequent report that will be shown when an object is selected. The final report is routed through a Collection using the Display Collection, Create Collection and Alter Collection. Let’s have a look at some of the defining attributes that are required to carry out these actions.
Collection Attributes – Trigger, Variable, and Report
The attribute of collection Trigger, Variable, and Report assists the Create Collection, Display Collection, and Alter Collection actions respectively.
[Collection : My Ledger]
Type : Ledger
Trigger : LedList Select
Report : Selected Ledger
Display Variable : Ledger Name
Attribute – Trigger
The Report collection attribute displays a Report depending on the selected Object. Item Monthly Summary, for example, is a default report that appears when you select a stock item.
Syntax
[Collection : <Collection Name>]
Report : <Report Name>
Where,
<Report Name > when an Object is chosen from the Collection, the final report is displayed.
Attribute – Variable
The attribute collection variable stores the name of the object selected. This attribute is used in conjunction with the actions Display Collection and Alter Collection.
Syntax
[Collection : <Collection Name>]
Variable : < Variable Name>
where,
<Variable Name> store the name of the object for displaying the subsequent Report.
Example
[Collection : Stock Items in Display Collection]
Type : Stock Item
Trigger : Stock Item Selection Interface
Report : Stock Item Final Report
Variable : Stock Item Name
Object Specific Actions
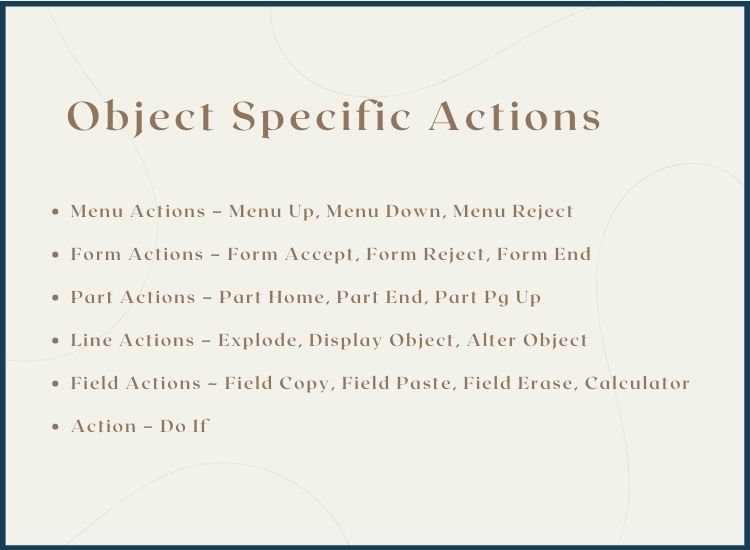
This section goes over some of the Object Specific actions:
Menu Actions – Menu Up, Menu Down, Menu Reject
Menu Up, Menu Down, Menu Reject, and so on are acted upon Menu. They are linked to all Menus (both Default and User Defined TDL) via the [System: Menu Keys] declaration.
Example
[Key : Menu Up]
Key : Up
Action : Menu Up
[Key : Menu Down]
Key : Down
Action : Menu Down
[Key : Menu Reject]
Key : Esc
Action : Menu Reject
[System : Menu Keys]
Key: Menu Down, Menu Up, Menu Reject
[System: Menu Keys] defines a list of frequently used Keys required for a Menu. Considering all common menu operations are stated here, such as Scroll Up, Scroll Down, Drill Down, and so on, a new Menu does not need these keys to be connected, as they are derived from the declaration above.
Form Actions – Form Accept, Form Reject, Form End
Form Accept, Form Reject, Form End and so on actions can act upon Form. They are linked to all Forms (both Default and User Defined TDL) via the [ System: Form Keys ] declaration.
- Form of Action Accept save the present Form.
- The current Form is rejected in this Action Form Reject, which means it is existed without being saved.
Example
[Key : Form Accept]
Key : Ctrl + A
Action : Form Accept
Mode : Edit
[Key : Form Display Reject]
Key : Esc
Action : Form Reject
Mode : Display
[Key : Form End]
Key : Ctrl + End
Action : Form End
[System : Form Keys]
Key: Form Accept, Form Display Reject, Form End
[ System: Form Keys ] defines a set of keys that are frequently used in Reports. All common Form operations are stated here, such as Save Form, Reject Form, Form End, and so on, a new Form does not need the association of these keys, as they are derived from the above declaration.
Part Actions – Part Home, Part End, Part Pg Up
Part Home, Part End, Part Pg Up, and so on actions are acted upon Part. Through the declaration [ System: Form Keys ], these keys are related to all Forms (Default TDL codes as well as User Defined TDL codes).
- The cursor is a position to the start of the current Part with the action Part Home.
- The cursor is placed to the end of the current Part using the action Part End.
- Action Part PgUp quickly scrolls the page to the previous page view.
Example
[Key : Part DisplayHome]
Key : Home
Action : Part Home
Mode : Display
[Key : Part Display End]
Key : End
Action : Part End
Mode : Display
[Key : Part Display PgUp]
Key : PgUp
Action : Part PgUp
Mode : Display
[System : Form Keys]
Key: Part Display Home, Part Display End, Part Display PgUp
[ System: Form Keys ] specifies a set of keys that are frequently used by a Part. As all common Part actions like Part Home, Part End, Part PgUp, and so on are stated here, a new Part does not need to be linked with these keys because they are derived from the declaration above.
Line Actions – Explode, Display Object, Alter Object
Line Actions – Explode, Display Object, Alter Object, and so on are act upon a Line.
- The action Explode expands a line to show all of the details specified in the Line attribute Explode.
- The action Display Object is utilized for displaying the Object in the current line’s context.
- The action Alter Object is utilized to change the Object in the current line’s context.
Example
[Key : Line Explode]
Key : Shift + Enter
Action : Explode
[Key : Line Object Display]
Key : Enter
Action : Display Object
Mode : Display
[Key : Line Object Alter]
Key : Ctrl + Enter
Action : Alter Object
Mode : Display
[System : Form Keys]
Key : Line Explode
Key : Line Object Display, Line Object Alter
[ System: Form Keys ] declares a set of frequently used keys for a Line. As all common Line operations are stated here, such as Explode, Display Object, Alter Object, and so on, a new Line does not need these keys to be connected, as they are derived from the declaration above.
Field Actions – Field Copy, Field Paste, Field Erase, Calculator
Field Copy, Field Paste, Field Erase, Calculator, and so on actions are acted upon Field.
- The current field (Field where the cursor is positioned) contents are copied to the OS clipboard using Action Filed Copy and will be available later.
The clipboard contents are pasted into the current Field using the Action Field Paste. - Without pressing the Backspace or Delete keys, Action Field Erase is utilized for erasing the current Field contents at a stretch.
- Without pressing the Backspace or Delete keys, Action Field Erase is utilized for erasing the current Field contents at a stretch.
- The Action Calculator is utilized for Fields that need computation and then return the result to the Field. This action is required for fields that accept Amounts/Numbers as a value.
Example:
[Key : Field Copy]
Key : Ctrl + Alt + C
Action : Field Copy
[Key : Field Paste]
Key : Ctrl + Alt + V
Action : Field Paste
[Key : Field Erase]
Key : Esc
Action : Field Erase
Mode : Edit
[Key : Calculator]
Key : Alt + C
Action : Calculator
Mode : Edit
[Field : NumDecimals Field]
Key : Calculator
[System : Form Keys]
Key : Field Erase
Key : Field Copy, Field Paste
[ System: Form Keys ] defines a set of typically needed Keys for any Field. As all of the common Field operations are defined here, such as Field Copy, Field Paste, and Field Erase, a new Field does not need these keys to be connected because they are derived from the declaration above. Because the Action ‘Calculator‘ isn’t needed across all fields, it’s not listed in the Form Keys use List. It’s been connected to the fields where it’s needed. NumDecimals Field is a numeric field that may involve calculations like the example above. As a result, the Field is connected with the Calculator key, which is associated with the action Calculator.
Action – Do If
Do If, which was only used as a procedural action, has been improved to accommodate conditional action execution in other definitions such as Button. When the condition occurs to true, the Do If system action executes the specified action.
Syntax
Do If: <Condition>: <Action Keyword>[:<Action Parameters>]
Where,
<Condition> evaluate any value or statement as true or false.
<Action Keyword> can be any global or action that is object-specific except for actions that are function-specific actions<><>
<Action Parameters> includes a collection of parameters needed by the activities provided, separated by a colon. This parameter may be optional depending on the action keyword specified.
Example 1: Do If in a function definition
[Function: MastersCount]
……..
001 : Do If: (##MasterType = “Group”):Increment : GroupCount
002 : Do If: (##MasterType = “Ledger”):Increment: LedgerCount
Example 2: Do If in button definition
[Button: CreateMaster]
Title : $$LocaleString:”Create Master”
Key: Alt+F4
ActionEx: Group : Do If:(##MasterType = “Group”) : Create : Group
ActionEx: Ledger: Do If:(##MasterType = “Ledger”): Create : Ledger
If the variable MasterType value is Group, the default group creation screen is displayed; otherwise, the ledger creation screen appears.
Before to Do If, conditional actions could be performed by utilizing the Switch/Option button definition. The number of lines in the code is reduced when the action Do If is used.
Example: Conditional action using Option
[!Form: Contra Color]
Local: Button: Print Button: Option: Vch Print: $$InCreateMode
Local: Button: Print Button: Option: Vch Chq Print: $$InAlterMode
[!Button: Vch Print]
Action: Print Report
[!Button: Vch Chq Print]
Action : Call : Voucher Printing
Example: Conditional actions using ActionEx
[!Form: Contra Color]
Local: Button: Print Button: Add: ActionEx: CreateMode:Do If: $$InCreateMode:Print Report
Local: Button: Print Button: Add: ActionEx: AlterMode:Do If: $$InAlterMode:Call:Voucher Printing
Summary
Actions are certain task activators with a specific outcome. User Interface (UI) objects Menu, Form, Line, or Field are the source of action. The different sorts of actions utilized in TDL include global actions and object-specific actions. Actions can be linked at several levels: a- Action connection at Menu definition. b- Button/Key definition action association. c- Field definition action association. An action is always carried out in relation to two contexts: 1. Originator. 2. Executer.
The following are some of the most commonly utilized global actions:- Menu, Object Modification, URL Browsing, Create and Change. The following are some of the object-specific actions: a. Actions of Menu include Menu Up, Menu Down, and Menu Reject. b. Actions of Form includes: Accept Form, Reject Form, and End Form. c. -Part actions include Part Home, Part End, and Part Pg Up. d. Line actions incudes Explode, Display Object, and Alter Object. e. Field actions include Field Copy, Field Paste, Field Erase, and Calculator. For any information about Tally on cloud service visit Tallystack.in.
